by Angie Lynn | Oct 7, 2025 | Blog
Step-by-Step Guide to Assembling Your Roomix House Floor Bed
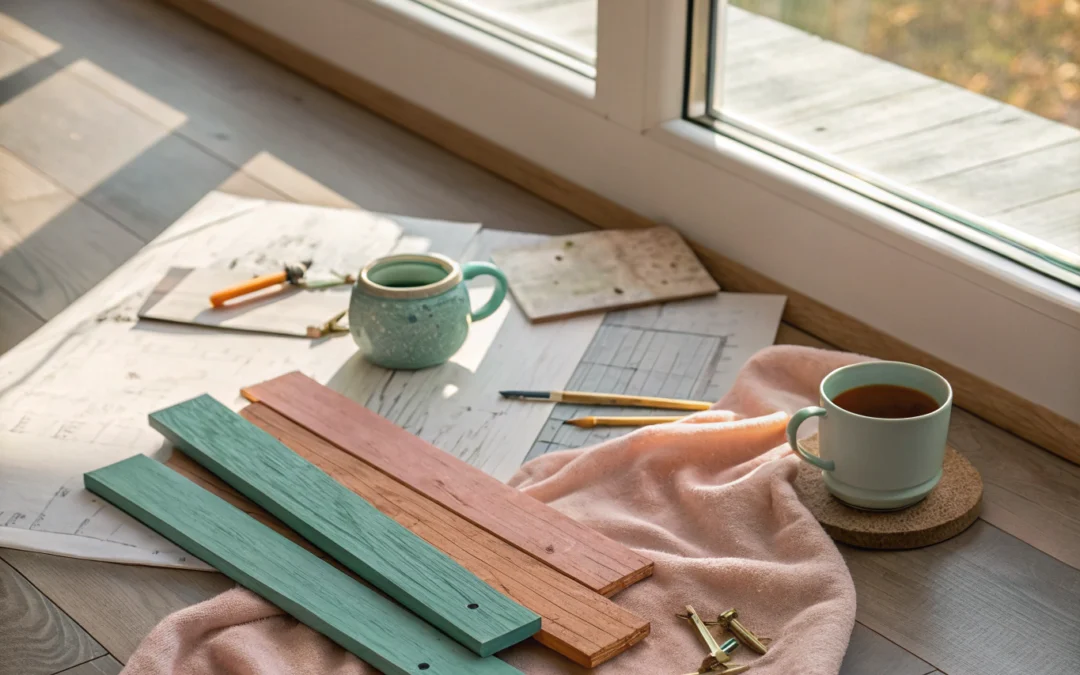
Creating a cozy and imaginative sleeping space for your toddler is easier than ever with the get inspired by Roomix’s house floor bed ideas. These charming floor beds combine the comfort of a mattress on the floor with the playful design of a house frame, offering your child a fun and safe environment to rest and play.
Why Choose a House Floor Bed?
House floor beds are gaining popularity for their minimalist design and child-friendly accessibility. Unlike traditional beds, they sit low to the ground, reducing the risk of falls and fostering independence as toddlers learn to climb in and out on their own. The house frame adds a whimsical touch, allowing for customization with decorations, lights, or fabric to create a unique nook your child will adore.
Tools and Materials Needed
Before you begin assembling your Roomix house floor bed, gather the following tools and materials to ensure a smooth process:
- All parts included in the Roomix house floor bed package
- Screwdriver (preferably electric)
- Allen wrench (usually provided)
- Rubber mallet (optional for gentle adjustments)
- Measuring tape
- Soft cloth to protect surfaces
Step-by-Step Assembly Instructions
1. Unpack and Organize Parts
Start by carefully unpacking all components and laying them out on a soft surface like a carpet or blanket. Check the parts list included in your package to ensure everything is present. Organizing the pieces will make assembly quicker and more efficient.
2. Assemble the Base Frame
Begin by connecting the base panels that will support the mattress. Use the screws and connectors provided, tightening them securely but not over-tightening to avoid damaging the wood. A stable base is essential for safety and durability.
3. Construct the House Frame
Next, attach the vertical posts and roof frame components. These form the iconic house shape. Align the joints carefully and use the Allen wrench or screwdriver to secure them. It’s helpful to have a second person assist with holding parts in place during this step.
4. Secure the Side Rails
Attach the side rails or panels to the base and house frame. These rails provide structure and a cozy enclosure for your little one. Double-check that all screws are tight and that the frame stands evenly on the floor.
5. Add the Mattress
Place the mattress inside the frame. Roomix beds typically fit standard toddler mattress sizes, but measure to confirm a perfect fit. A snug mattress ensures comfort and safety.
6. Customize Your Bed
Once assembled, personalize the house floor bed with soft bedding, pillows, or gentle string lights to create a magical sleeping area. The open frame allows for endless creative possibilities, making bedtime exciting for your child.
Tips for a Smooth Assembly
- Follow the instruction manual closely and keep all small parts in a container to avoid loss.
- If the wood has protective film, remove it only after assembly to prevent scratches.
- Take your time aligning pieces before tightening screws to ensure everything fits perfectly.
- Use a rubber mallet gently if some joints need a little extra encouragement.
Final Thoughts
Assembling your Roomix house floor bed is a rewarding project that transforms your child’s bedroom into a playful sanctuary. With careful attention to each step, you’ll create a sturdy, beautiful bed that encourages independence and sparks imagination. Ready to start? Get inspired by Roomix’s house floor bed ideas today and bring a piece of childhood magic into your home.
by Angie Lynn | Oct 7, 2025 | Blog
Choosing the Perfect Kitchen Pulls for Cabinets: Style, Function, and Tips
When it comes to transforming your kitchen, small details can make a significant impact. One of the most effective ways to refresh the look and functionality of your space is by selecting the right kitchen pulls for cabinets. These hardware pieces are not just functional; they also serve as decorative accents that can elevate your kitchen’s overall aesthetic. Whether you’re undertaking a full remodel or simply updating your cabinets, understanding the options available can help you make informed choices that blend style with practicality.
Understanding Different Styles of Kitchen Pulls
Types of Kitchen Pulls
Kitchen pulls come in a variety of styles, each offering a distinct look and feel. The most common types include bar pulls, cup pulls, and knob pulls. Bar pulls are sleek and modern, featuring elongated handles that are easy to grip and clean. Cup pulls, often seen in vintage or farmhouse kitchens, have a rounded, cup-like shape that provides a comfortable grip. Knob pulls are classic and versatile, fitting seamlessly into traditional or contemporary designs alike.
Material and Finish Options
Choosing the right material and finish is crucial for both durability and aesthetic harmony. Common materials include brass, stainless steel, zinc, and even glass. Finishes range from matte and brushed to polished and antique. For a timeless appeal, brass or brushed nickel finishes work well, while matte black adds a modern, bold touch. Consider your existing kitchen hardware, fixtures, and overall color palette to select pulls that complement your space.
Factors to Consider When Selecting Kitchen Pulls
Size and Scale
Size matters when choosing kitchen pulls. Larger pulls can make a statement and are easier to grip, especially for those with limited dexterity. Smaller pulls tend to blend more subtly into cabinetry, providing a minimalist look. Measure your cabinet doors and drawers carefully, ensuring that the pulls are proportionate and comfortable to use.
Functionality and Comfort
Functionality is key—consider how easy the pulls are to grasp and operate. For heavy drawers or cabinets, sturdy pulls with a comfortable grip are essential. Additionally, think about the placement and whether the pulls will interfere with other kitchen elements, like appliances or neighboring cabinets.
Design Cohesion
To create a harmonious look, select pulls that match or complement other hardware in your kitchen. Mixing metals or styles can be visually interesting if done thoughtfully, but a cohesive approach often yields a more polished appearance. Remember, the hardware you choose can serve as a unifying element tying together your kitchen’s overall design theme.
Installation Tips and Tricks
Proper Measurement
Accurate measurement is critical for a clean, professional look. Measure the distance between screw holes on existing hardware or determine the ideal placement for new pulls. Use a level to ensure horizontal alignment, especially on multiple drawers or cabinets.
Ease of Installation
Most kitchen pulls are straightforward to install, requiring only a screwdriver and some basic measurements. For a uniform look, mark the drilling points carefully and double-check before drilling. Some pulls come with template guides to simplify the process.
Final Thoughts
Choosing the right kitchen pulls for cabinets is more than a matter of aesthetics—it’s about balancing style, comfort, and practicality. By understanding the different styles, materials, and installation techniques, you can select hardware that enhances your kitchen’s beauty while ensuring ease of use. Remember, this small detail can make a big difference in your space’s overall look and functionality. For a wide range of options and expert advice, explore the detailed guide on kitchen pulls for cabinets.
by Angie Lynn | Oct 7, 2025 | Blog
Maximizing Space and Style with a Corner Shelving Unit
In modern home design, efficient use of space is more important than ever. Whether you’re decorating a cozy apartment or a spacious living room, a corner shelving unit offers a versatile solution that combines functionality with aesthetic appeal. These units are not only practical for storage but also serve as eye-catching focal points that can enhance the overall decor of any room.
The Benefits of Choosing a Corner Shelving Unit
Optimized Use of Space
One of the primary advantages of a corner shelving unit is its ability to utilize often underused corner areas. Instead of letting corners sit empty or cluttered, a well-designed unit transforms these spaces into organized zones for displaying books, plants, decor, or daily essentials. This maximizes floor space and keeps your living area tidy.
Enhancing Aesthetic Appeal
Corner shelves come in various styles, materials, and finishes, making it easy to find a piece that complements your interior design. Whether you prefer a sleek modern look, rustic charm, or vintage appeal, there’s a corner shelving unit to match your taste. When styled thoughtfully, these units can add visual interest and personality to your space.
Types of Corner Shelving Units
Floating Corner Shelves
Floating shelves are a minimalist choice that creates a clean, contemporary look. They are mounted directly onto the wall, giving the illusion of floating in mid-air. Perfect for displaying small decorative items or plants, floating corner shelves are easy to install and maintain a sleek profile.
Corner Bookcases
For those with a collection of books or a desire for more storage, corner bookcases are an excellent option. These come in various heights and configurations, often featuring multiple shelves for organization. They can serve as a statement piece while providing functional storage space.
Multi-tier Corner Units
Multi-tier corner shelving units combine both open and enclosed storage options. They often feature adjustable shelves, drawers, or cabinets, making them ideal for diverse storage needs. Their layered design adds depth and texture to your room’s decor.
Materials and Styles to Consider
Wood
Wooden corner shelves are timeless and versatile. They can be crafted from solid wood or engineered wood, offering durability and natural beauty. Light-colored woods brighten small spaces, while darker finishes add warmth and sophistication.
Metal
Metal corner shelves often have an industrial or modern vibe. They are sturdy and can support heavier items. Metal units are also easy to clean and maintain, making them a practical choice for busy households.
Combination Materials
Many designs blend wood and metal, creating a contemporary look that combines warmth with structural strength. These hybrid units are popular among interior designers seeking a balanced aesthetic.
Tips for Styling Your Corner Shelving Unit
- Display a mix of items: Combine books, plants, picture frames, and decorative objects for visual interest.
- Use varying heights: Arrange items at different levels to create dynamic displays.
- Keep it balanced: Distribute weight evenly across shelves to maintain stability and harmony.
- Incorporate lighting: Add small LED lights or spotlights to highlight your favorite decor pieces.
Conclusion
Integrating a corner shelving unit into your living space is a smart move that maximizes storage while enhancing your interior design. Whether you opt for floating shelves, a bookcase, or a multi-tier unit, the right choice depends on your style, storage needs, and available space. With thoughtful selection and styling, a corner shelving unit can become a functional centerpiece that elevates your home’s aesthetic and organization. Explore more about these versatile units and find the perfect fit for your space by visiting the full article on corner shelving unit.
by Angie Lynn | Oct 6, 2025 | Blog
Transform Your Space with Innovative Panelling Ideas
Revamping a room’s aesthetic can often feel overwhelming, but one of the most effective and versatile design strategies is incorporating wall panelling. Not only does panelling add depth and character to a space, but it also offers a practical solution for hiding imperfections and creating a focal point. For those seeking inspiration and practical advice, exploring panelling ideas can open up a world of creative possibilities tailored to any style or budget. Additionally, you might find valuable insights in our Blog Archives – theOnceandFuturePodcast for more interior design inspiration.
Why Choose Wall Panelling?
Wall panelling has stood the test of time, continuously adapting to modern interior trends while maintaining its classic appeal. It provides an easy way to elevate a room’s design without a complete overhaul. Panelling can add texture, dimension, and a sense of craftsmanship that simply paint or wallpaper might not achieve. Moreover, it’s a flexible element that can be customized to suit various aesthetics—from traditional to contemporary—and can be installed in almost any room, including living rooms, bedrooms, bathrooms, and even kitchens.
Types of Panelling to Consider
1. Shiplap
Shiplap is characterized by horizontal wooden boards with a slight gap between each plank, creating a clean, modern look. It’s popular for its rustic charm and is perfect for accent walls in living rooms or kitchens. Its straightforward installation makes it a favorite among DIY enthusiasts.
2. Beadboard
Beadboard features vertical panels with narrow, rounded grooves, adding a soft, cottage-style touch. Ideal for bedrooms, bathrooms, or porch areas, beadboard can be painted in any color to match your interior palette.
3. Wainscoting
This classic paneling style involves installing decorative panels along the lower portion of a wall, often topped with a chair rail. Wainscoting adds sophistication and can be made from wood, MDF, or PVC for moisture-prone areas.
4. Panel Moulding and Frame Moulding
Using mouldings to create framed panels on walls offers a tailored and elegant appearance. This style is often seen in formal dining rooms or master bedrooms, providing a timeless, architectural element.
Creative Panelling Ideas for Different Spaces
Living Rooms
Create a striking feature wall using wide planks of reclaimed wood or sleek MDF panels painted in bold hues. Combining different panel styles, such as wainscoting with a contrasting paint color, can add visual interest and define the space.
Bedrooms
Headboards made from panelling materials like shiplap or beadboard instantly add charm and warmth. Consider framing the bed with vertical or horizontal panels to generate a cozy, inviting atmosphere.
Bathrooms and Wet Areas
Moisture-resistant panelling materials like PVC or treated MDF are ideal for bathrooms. Beadboard wainscoting can protect walls from water damage while adding a classic touch.
Kitchens
Use panelling behind open shelving or along the backsplash area to add texture and personality. White-painted shiplap creates a clean, fresh look, while darker hues can add a dramatic flair.
Tips for Successful Panelling Installation
- Plan Your Design: Consider the overall style of your space and choose a panelling type that complements it.
- Measure Carefully: Accurate measurements ensure panels fit perfectly and achieve a seamless look.
- Choose Quality Materials: Invest in durable materials suitable for your environment to ensure longevity.
- Prep the Walls: Properly clean and smooth wall surfaces before installation for the best adhesion and finish.
- Take Your Time: Whether DIY or professional installation, patience and precision are key to a polished result.
Final Thoughts
Wall panelling offers a timeless and adaptable way to enhance any interior. With so many styles and applications available, you can tailor your approach to match your personal taste and the unique architecture of your home. For a comprehensive collection of panelling ideas and expert tips on bringing your vision to life, be sure to explore the detailed insights available at panelling ideas. Additionally, for more inspiration and creative ideas, check out our Blog Archives – theOnceandFuturePodcast. Whether you aim for a rustic charm or sleek modernity, panelling can be the transformative element that elevates your space from ordinary to extraordinary.
by Angie Lynn | Oct 6, 2025 | Blog
Transforming Your Kitchen: The Art of Choosing the Perfect Cupboard Handles
When it comes to revamping your kitchen, every detail counts—down to the small but impactful elements like cupboard handles. Often overlooked, these hardware pieces can dramatically influence the overall aesthetic and functionality of your space. Whether you’re aiming for a sleek modern look or a charming vintage vibe, selecting the right handles is essential for achieving your desired style while ensuring ease of use.
The Importance of Cupboard Handles in Kitchen Design
Beyond Aesthetics: Functionality and Comfort
Cupboard handles are more than just decorative accents; they are integral to the usability of your cabinets. Comfortable, well-designed handles make opening and closing doors effortless, especially in a busy kitchen environment. Properly chosen handles reduce strain on your hands and fingers, which is particularly important if you have mobility issues or find standard handles uncomfortable.
Making a Style Statement
From minimalist bar pulls to ornate vintage knobs, cupboard handles serve as finishing touches that reflect your personal style. They can complement your cabinetry and overall decor theme, whether it’s sleek and contemporary or rustic and cozy. The right handles can also add a touch of sophistication or rustic charm, transforming a plain cabinet into a standout feature of your kitchen.
Choosing the Right Cupboard Handles: Key Considerations
Material Matters
Handle materials include metal, wood, plastic, and ceramic, each offering different textures and durability. Metal handles such as stainless steel or brass are popular for their longevity and modern appeal, while wooden handles lend warmth and a traditional feel. Consider your kitchen’s overall material palette and choose handles that harmonize with existing finishes.
Style and Design
Select handles that match your cabinetry style. Sleek, straight bar handles suit contemporary kitchens, while vintage or ornate knobs work well with farmhouse or traditional styles. Pay attention to the size and shape; larger handles provide a bold statement, while smaller ones offer subtle elegance.
Size and Placement
Handle size should be proportional to cabinet doors and drawers. Too small, and they might be hard to grip; too large, and they may look overpowering. Placement also matters—handles should be positioned for comfortable opening and closing, typically centered vertically on drawers and placed 1 to 2 inches from the edge of cabinet doors.
Trends in Cupboard Handles
Minimalist and Sleek
Modern kitchens often favor minimalism, with handleless designs or slim, unobtrusive handles. Push-to-open systems are also gaining popularity for their clean lines and seamless appearance.
Vintage and Rustic
For a cozy, farmhouse look, vintage knobs and handles in aged brass, wrought iron, or distressed finishes add character and charm.
Bold and Unique
Some homeowners opt for statement handles, such as oversized pulls or colorful ceramic knobs, to inject personality into their kitchen decor.
Maintenance and Durability
Choosing durable materials ensures your handles withstand the rigors of daily use. Metal handles are generally easy to clean and resist corrosion, especially in humid environments like kitchens. Regular cleaning with appropriate solutions maintains their appearance and prevents buildup of grease and grime.
Final Tips for Selecting Cupboard Handles
- Match handle finishes with other hardware fixtures like faucets and light fixtures for a cohesive look.
- Consider the ergonomics—handles should be easy to grip and operate comfortably.
- Order samples if possible to see how handles look with your cabinetry before committing.
- Keep in mind the overall style of your kitchen and choose handles that enhance rather than clash with your design theme.
In conclusion, the choice of cupboard handles might seem minor, but it plays a crucial role in defining your kitchen’s style and functionality. Thoughtful selection can elevate your space from ordinary to extraordinary, making daily tasks more pleasant and your kitchen more beautiful. For more inspiration and detailed guidance, explore the comprehensive tips on cupboard handles.